Quark - Theme Documentation
By Progression Studios
Thank you for purchasing this theme. If you have questions that are beyond the scope of this help file, visit our support forum.
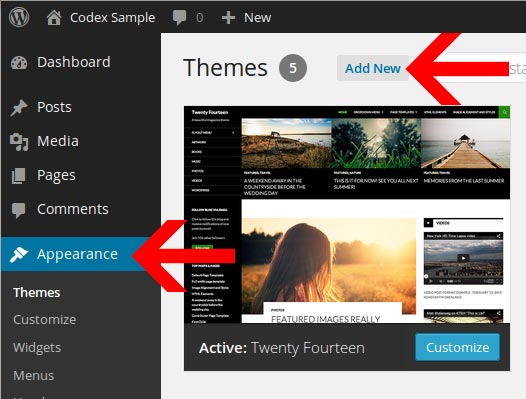
Theme Installation
You can install Themes directly to WordPress by using the Add New Themes option in the Appearance sub-menu.
- Log in to the WordPress Administration Panels.
- Select the Appearance panel, then Themes.
- Select Add New.
- Then Select Upload Theme.
- You can then Install your Theme and Activate it.
Adding New Themes Manually (FTP)
To add a new Theme to your WordPress installation, follow these basic steps:
- Download the Theme archive and extract the files it contains. You may need to preserve the directory structure in the archive when extracting these files. Follow the guidelines provided by your Theme author.
- Using an FTP client to access your host web server, create a directory to save your Theme in the wp-content/themes directory provided by WordPress. For example, a Theme named Test should be in wp-content/themes/test. Your Theme may provide this directory as part of the archive.
- Upload the Theme files to the new directory on your host server.
Recommened Plugins
After installing your theme, you will be prompted to install a set if additional plugins. Click on the "Begin Installing Plugins" text link to install the plugins.
You will then view the "Install Required Plugins" page. You can also reach this page under Appearance > Install Plugins. You can select all the items and Bulk Install the plugins or install the plugins one at a time.
Note: We strongly recommend installing theses upon the initial installation. You can also deactivate and remove any plugins later on.
Missing style.css stylesheet error
If you have any issues installing your theme. Visit this faq.
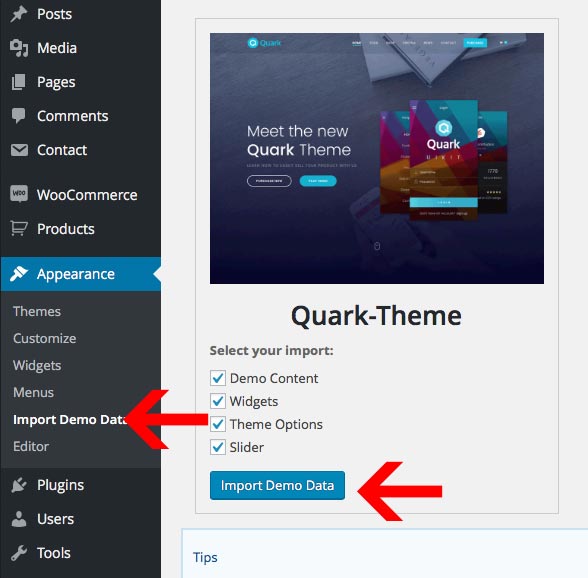
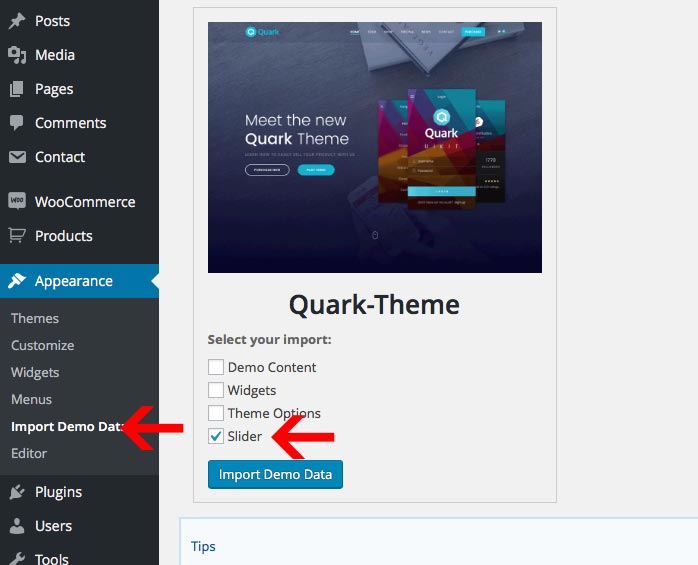
Import Demo Content
You can import the demo content under Appearance > Import Demo Data. Just click "Import Demo Data" and wait until the importer notifies you the import is completed. Please click import only once and wait, it can take a couple of minutes. If you click import mulitple times it will duplicate the menu items under Appearance > Menus. However the pages themselves will not be duplicated.
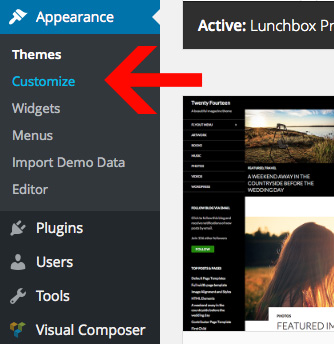
Theme Options
You can easily customize your the theme options under Appearance > Customize.
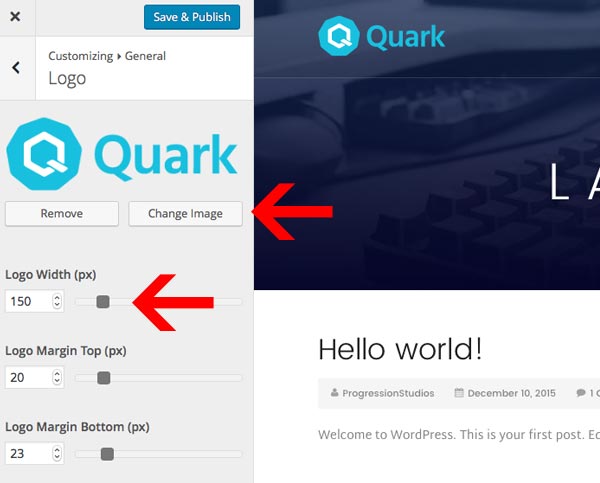
Changing the Logo
You can easily adjust the logo in the Theme Customizer(Appearance > Customizer) under section "General" and sub-section "Site Logo".
To change your logo, click "Change Image" and choose your new logo. Make sure to adjust the "Logo Width" to match your logo.
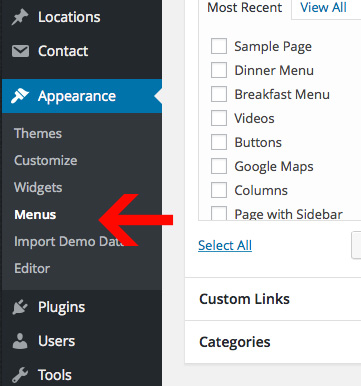
Navigation Menu
You can create & manage your navigation menus under Appearance > Menus.
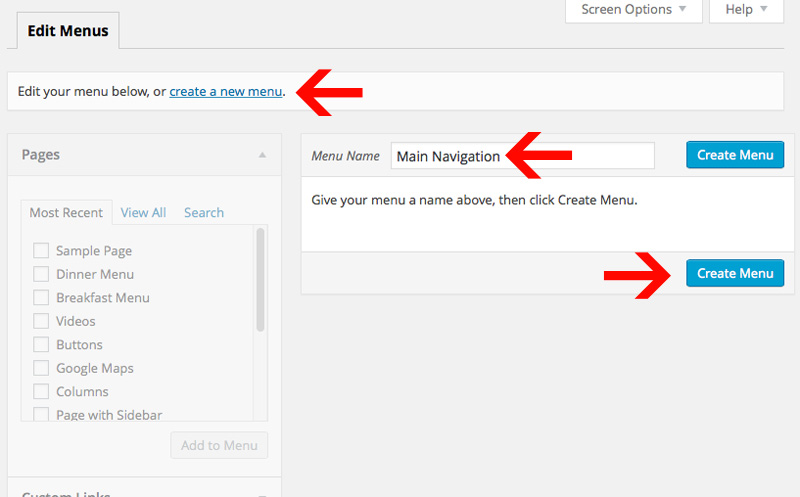
Step 1: Create a Menu
To start, create a new menu. You can click on text link "create a new menu". Then, enter in a menu name and click "Create Menu".
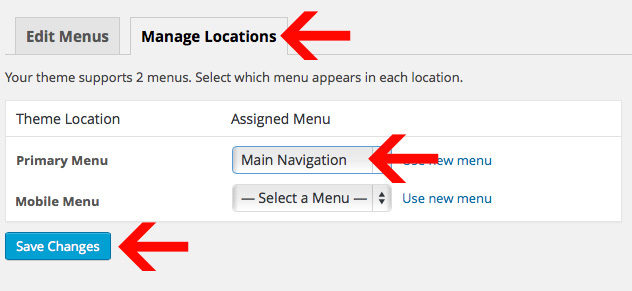
Step 2: Set the Menu Location
After you have created your menu, you need to select the Theme Location. You can do this by going under the "Manage Locations" tab at the top. Then select a menu under "Primary Menu" or "Mobile Menu" and click "Save Changes".
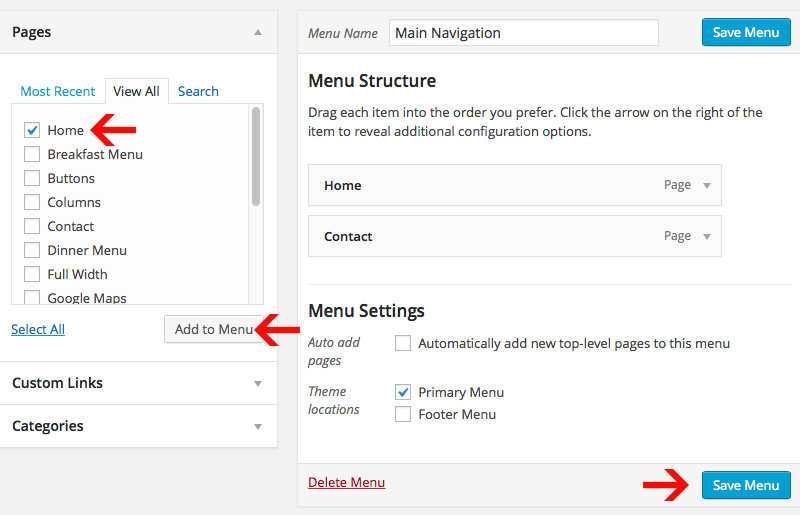
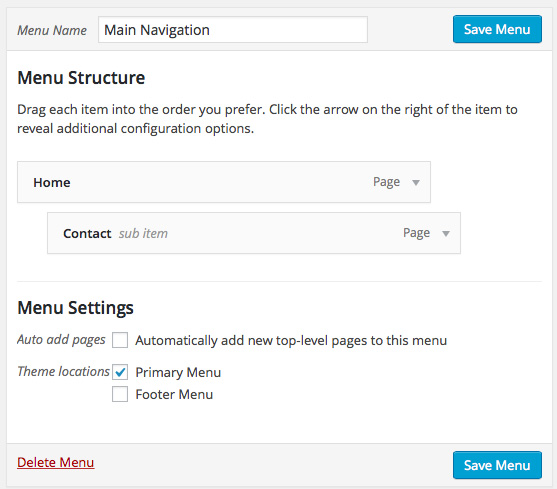
Step 3: Add pages to your Menu
You can then start adding pages and links to your menu. After you click "Add to Menu", it will move the menu item menu on the right. You can drag menu items around to order them. Or customize/delete the menu items by clicking on the down arrow on the right. Make sure to save the menu when you are done editing it.
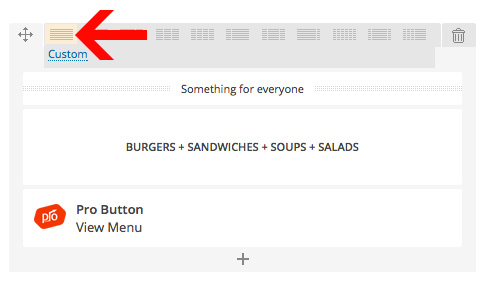
Adding Sub-menus
You can make multiple level's of sub-menus. All you need to do is drag the menu item that you want inside the sub-menu under-neath the parent menu item. There will be an option to indent the item, so that the sub-menu item looks like it is pushed inside of the parent menu item. See example, "Contact" is in a sub-menu of the parent page "Home":
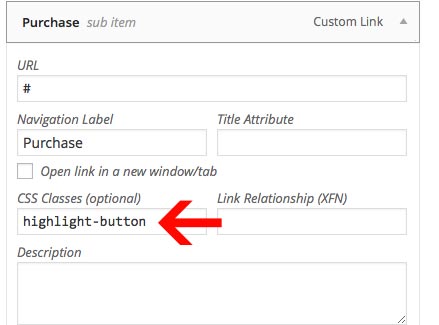
Adding "Purchase" button
You can easily add a "purchase" button by adding the class "highlight-button" to a navigation element.
Note: In order to enable custom CSS classes, you will need to click "Screen Options" at the top of the page and check the "CSS Classes" checkbox.
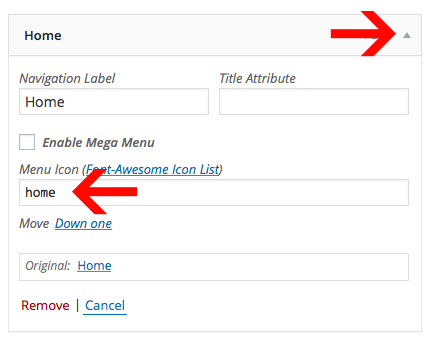
Adding Menu Icons
You can easily add-in a menu icon by clicking the small down-arrow and editing the menu item.
You can get a list of avaialble icons here: http://fortawesome.github.io/Font-Awesome/icons/. Just pick an icon and then type in the name of the icon in the "Menu Icon" field.
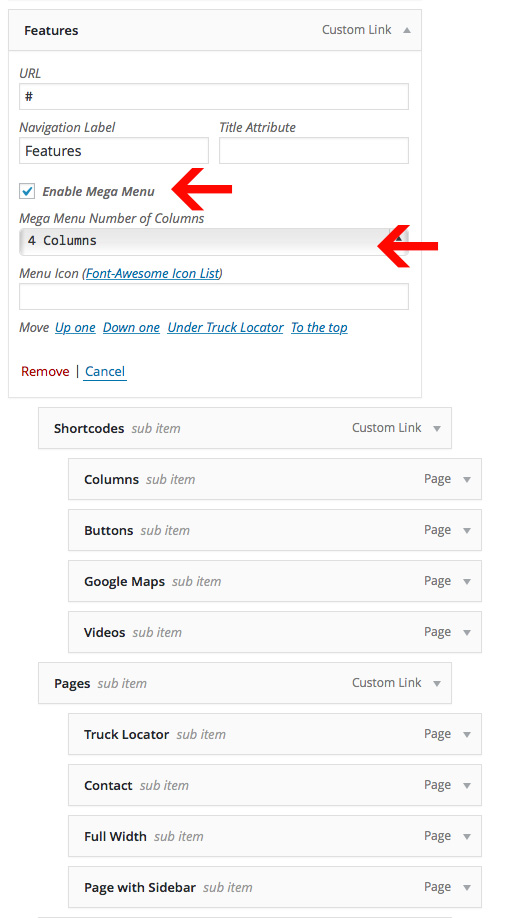
Adding Mega-Menu's
You can easily add-in support for mega-menus by clicking the small down-arrow and editing the menu item. Just click "Enable Mega Menu" and then choose the ammount of columns you want to use for your mega menu.
The first sub-menu level is going to be the heading for the column (Use Custom Link with "#" added in for the URL). The next sub-level will display the navigation item. Here is an screen-shot example of how the live preview menu is setup:
Page Builder
This theme is powered by the page builder "Visual Composer". Check out the full Visual Composer documentation here: https://wpbakery.atlassian.net/wiki/display/VC/Learning+More
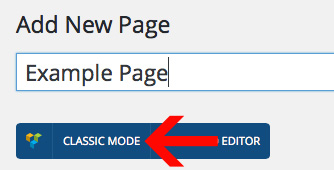
Using the Page Builder
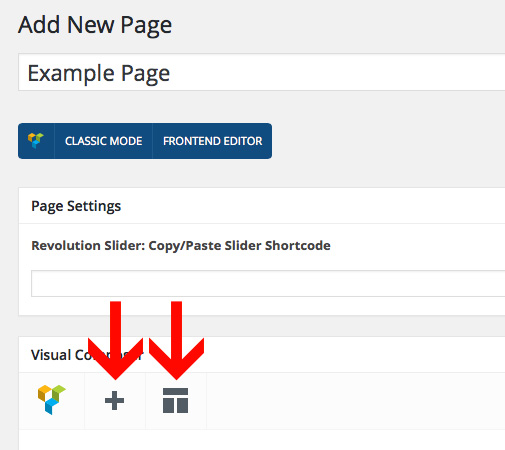
While editing a page, start by clicking "Classic Mode" or "Frontend Editor". We recommend the Classic mode but both wil work.
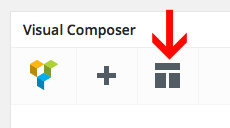
From there you can Add Elements or Templates. The most common one will be Elements (the +). These two buttons are located at the top of the Visual Composer Editor:
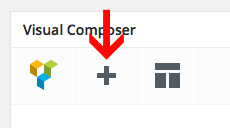
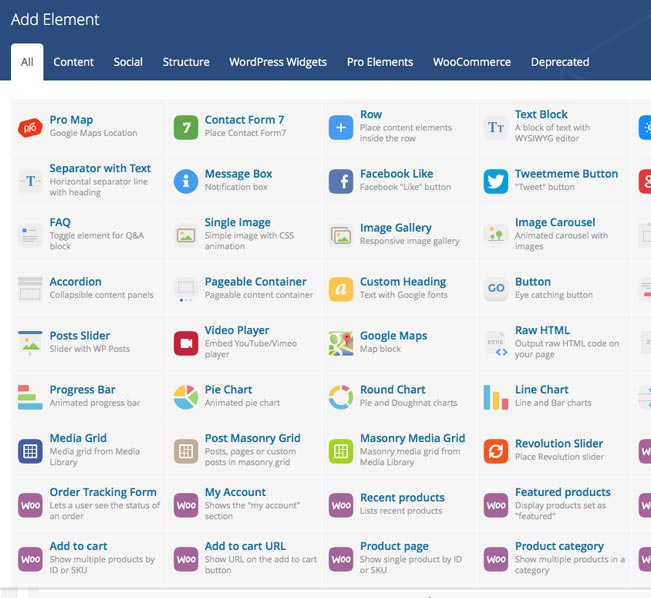
Adding Elements
You can add elements by clicking the + icon. From there you get a list of elements. Choose any element and start building. Each element has a bunch of options that you can edit or leave as is:
Adding Templates
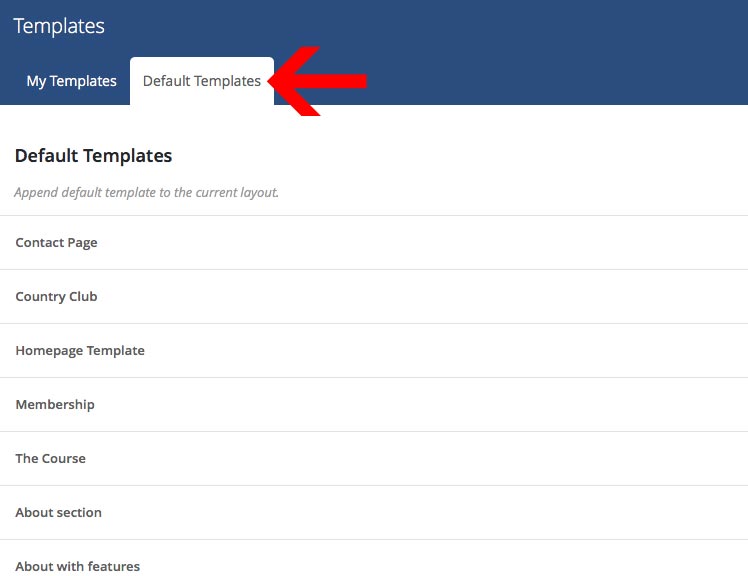
Templates can be used to re-create various pages or sections of the site. Click on the layouts button to open the layout options:
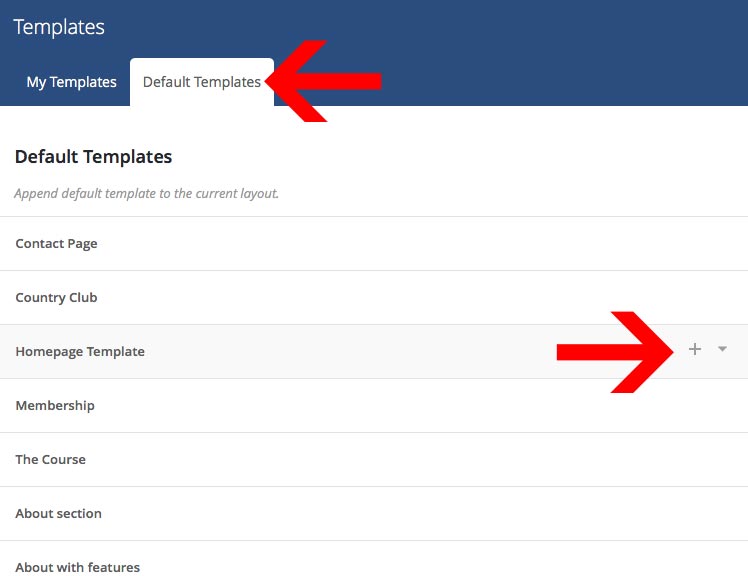
Then click on the "Default Templates" tab in order to see all the built-in templates.
Homepage Template
To create the homepage, simply click on the "Homepage Template".
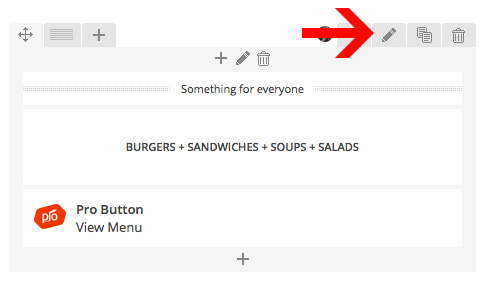
Row Options & Backgrounds
You can edit various rows option by clicking on the "Pencil" icon. This allows you to stretch the rows to full width, add background images, and more.
Adjusting Columns
You can easily edit the columns by clicking on the Column icon and adjusting it as needed:
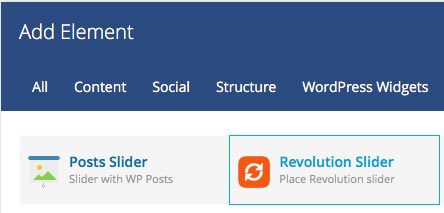
Revolution Slider
The theme slider is powered by the "Revolution Slider". Check out the full Revolution Slider documentation here: http://revolution.themepunch.com/documentation/
Importing Live Preview Slider
You can import the slider under Appearance > Import Demo Data. You will want to select "Slider" and then click "Import Demo Data".
Add Slider (Any Page)
You can add the slider onto any page by selecting the Visusal Composer element "Revolution Slider".
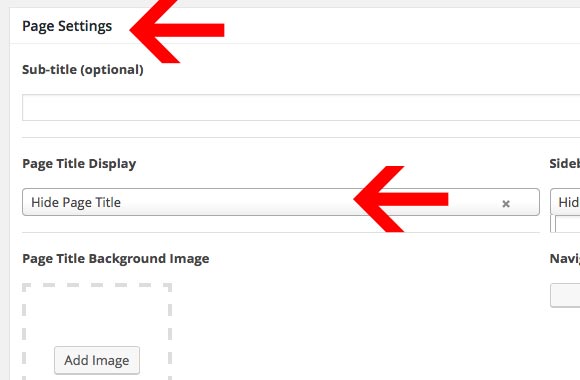
Remove page title
You can remove the page title by editing the Page Settings:
Shop
The shop is powered by the "WooCommerce". Check out the full WooCommerce documentation here: http://docs.woothemes.com/documentation/plugins/woocommerce/
Installing WooCommerce is easy with these two steps:
- Install the Plugin
- Let WooCommerce Create the Pages for you
Step 1) Install the Plugin
Install the WooCommerce plugin in WordPress under "Plugins" > "Add New".
Click on "Add New" and search for the plugin "WooCommerce".
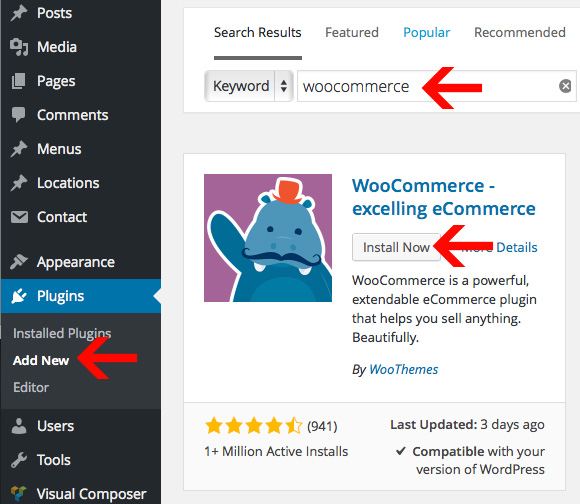
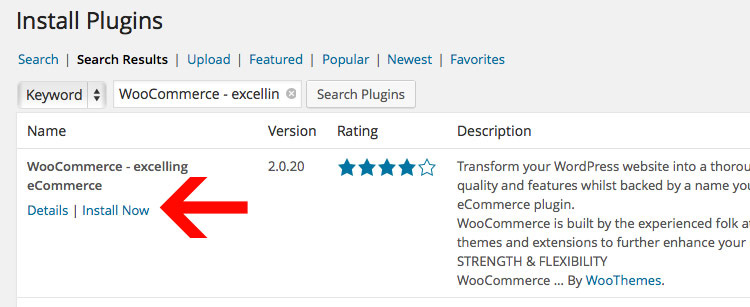
Then click on the text link "Install Now". The plugin should be at the top listed as "WooCommerce - excelling eCommerce". The final step is to click "Activate" in order to active the plugin.
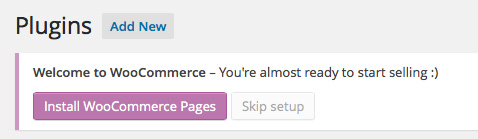
Step 2) Let WooCommerce Create the Pages for you
After you upload and "Activate" the plugin. You will get prompted to "Install WooCommerce Page". Click on that link to install of the necessary shop pages.
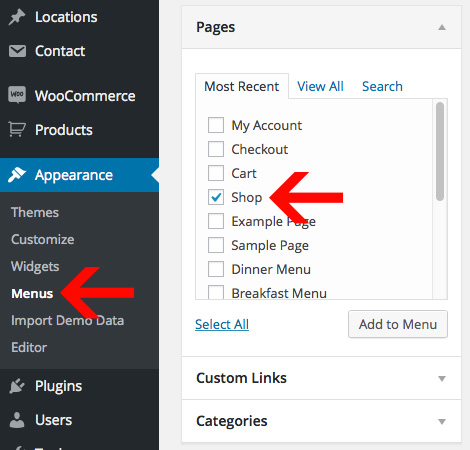
Once the pages have been added, you can add the to your menu under Navigation > Menus. The shop index is listed as "Shop".
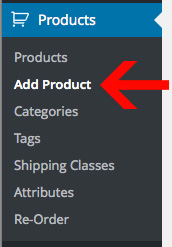
WooCommerce - Adding Products
You can manage all of the shop products under the sidebar heading "Products".
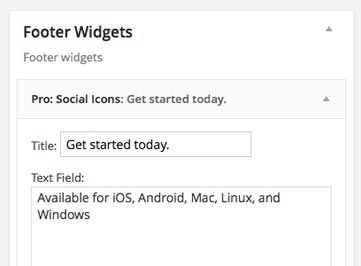
Footer & Sidebar
The footers and sidebars are controlled by widgets. You can edit these areas under Appearance > Widgets. Just drag/drop in a widget into the widget area. Here is an example of the Footer Widgets from the live preview:
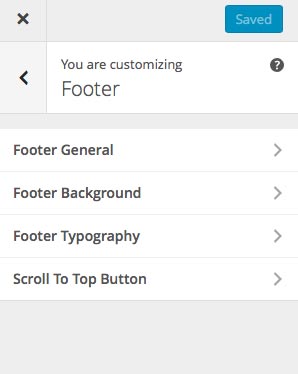
Copyright Text & Additional Options
You can edit the footer copyright text under the Theme Options (Appearance > Customize). The footer settings are located under "Footer".
Sidebar
You can turn on the sidebar while editing any page under "Page Settings" at the bottom.

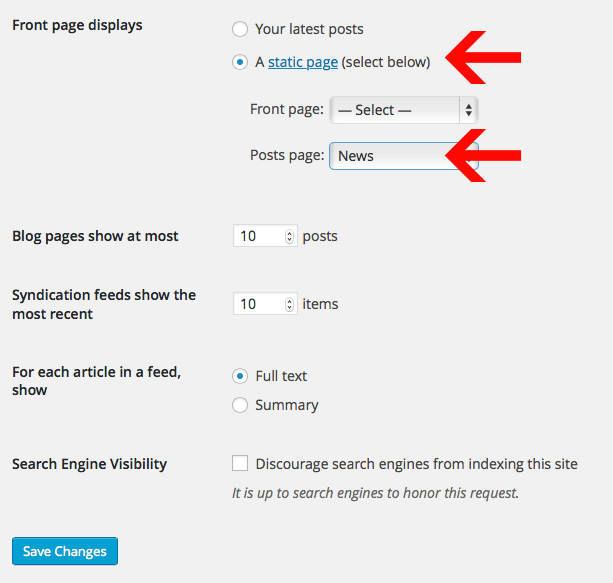
Blog Setup
First, you will need to create a page that you would like to be your Blog. Then you need to need to go to "Settings > Reading".
Then select "A static page" and choose your newly created page under "Posts page".
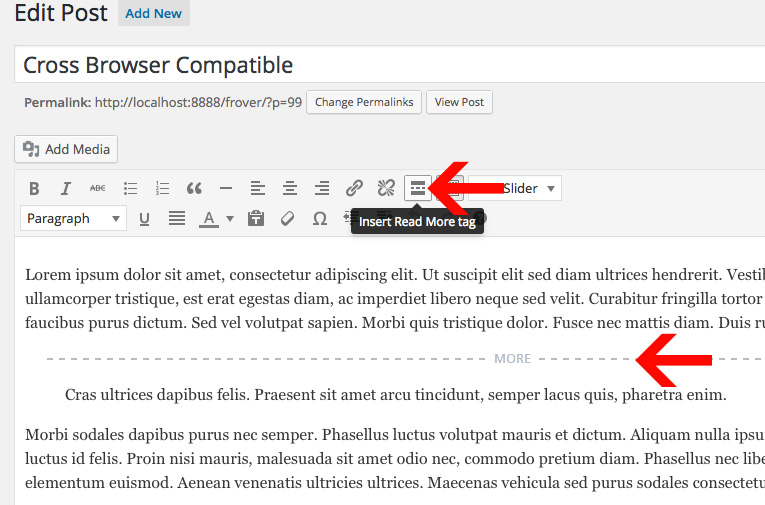
Adding the 'Continue Reading' Button (Cut-off content on index)
By default the blog-posts on the blog index will display all content. If you want to cut-off the blog-post on the index earlier, you will use the "Insert More" tag. The information above the break will be displayed on the Blog Index and all other information will be displayed on the post page. You can find the button for in default text editor as shown in the example.
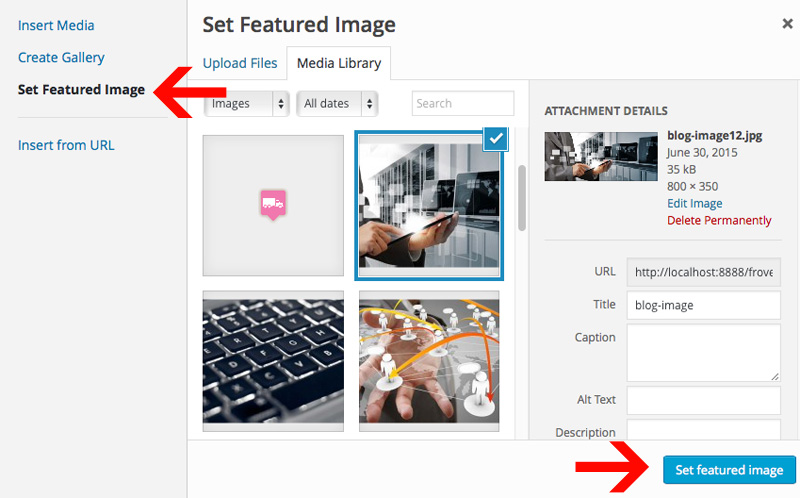
Adding a Featured Image
Just click "Add Media" and upload the image. Then click "Set Featured Image" and select your image. The last step is to click "Use as featured image". See the example below.
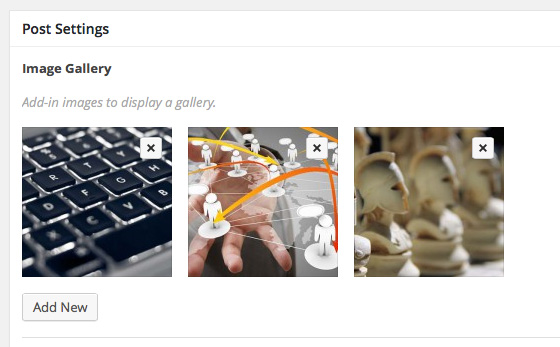
Adding an Image Gallery
You can add an image gallery by editing the "Post Settings" at the bottom of the post. Just click "Add New" under the Image Gallery and add-in as many images as you need.
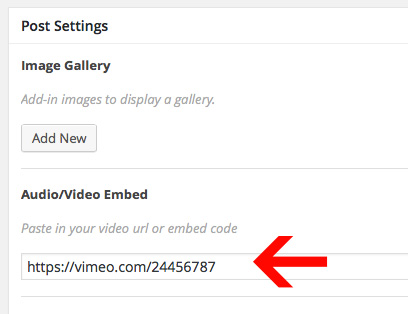
Adding audio/video to your Post
You can add a song or video by editing the "Post Settings" at the bottom of the post. Just copy/paste your URL or embed code into the meta-box flabeled "Audio/Video Embed".
Changing numbe of blog posts per page
Changing the number of blog posts that display on the index is just a matter of going to Settings > Reading.
Translating
This theme is ready to be translated to any language. The easiest way to translate is via a Translation WordPress Plugin. Check out wordpress.org for a list of translation plugins. Our current recommendation is the plugin Loco Translate
You can learn more about translating WordPress via the Translating WordPress Documentation.
Need to support Multiple Languages?
Here are some of the Multilingual WordPress Plugins that will allow you to add multiple languages:
- Manage multilingual posts in one post per language (e.g. WPML - paid, xili-language, Polylang or Bogo). Translations are then linked together, indicating that one page is the translation of another.
- Store all languages alternatives for each post in the same post (e.g. qTranslate).
- Manage translations on the generated page instead of using a post context (e.g. Transposh and Global Translator)
- Plugins that direct you to external translation services (e.g. Google AJAX Translation)
- Plugins like Multisite Language Switcher, Multilingual Press, and Zanto, link together separate WordPress network (multisite) installations for each language by pinging back and forth.
Missing Font Characters
If you notice any font characters missing, you will need to select additional Font Subsets. You can manage this under Appearance > Customize under the Typography tab.
Note: Some fonts do not support all font sub-sets. If your font does not support your language, you will need to choose another font that supports your font characters.
Customizations
Any questions regarding customizations of themes are not included in theme support. It is up to the buyer to make any necessary customizations they need. If you would like to hire us for custom development, please contact here: http://progressionstudios.com/contact/
If you have questions that are beyond the scope of this help file, visit our support forum.
Tips on Customizing CSS
If the customization you want to change isn't listed in the Theme Customizer, check the style.css file. We have a table of contents at the top that points out all of the sections within theme. You can also look-up styles using FireBug for FireFox or Safari/Chrome Inspector. This will allow you to edit additional places within the theme.
How to use Firebug for Firefox to look-up styles in the style.css file: https://www.youtube.com/watch?v=6eTW8-C6_gk
How to use Inspector for Safari & Chrome to look-up styles in the style.css file: https://www.youtube.com/watch?v=nOEw9iiopwI
Google Maps API Key
As of June 22, 2016 Google has started to require an API key to use Google Maps on your site. Don't worry as this is still free. You just need to register with Google and get a free API key. Then paste the key into our theme.
Step 1) Register and get an API Key here: https://developers.google.com/maps/documentation/javascript/get-api-key

Step 2) Login to your WordPress site and add your API key into your theme customizer. (Appearance > Customize > Google Maps)
